How to Add Upsell Products on Shopify
Adding upsell products on Shopify is one of the most practical ways to increase your average order value.
You can show related products, useful add-ons, “Frequently Bought Together” style offers, or discounted extras directly on your product pages.
In this guide, I’ll show you how to install upsells on a Shopify product page using AS Discounts & Upsells App, a Shopify upsell and cross-sell app built for product page, cart page, and cart drawer offers.
The app uses a fair, flat monthly price, and has a 14 day free trial. Try it risk-free.
What you will create
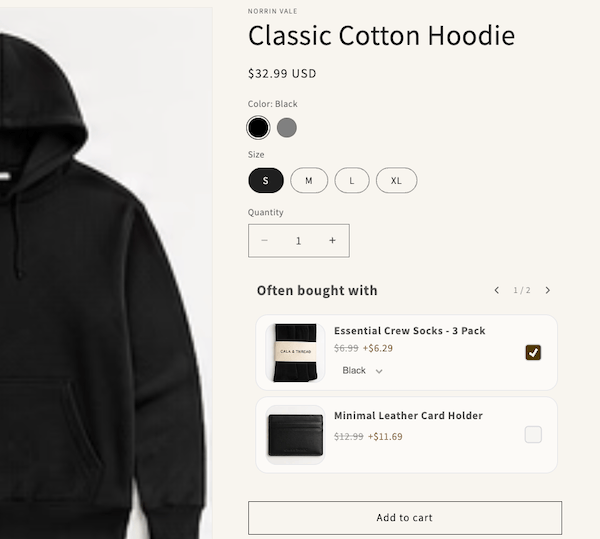
In this tutorial, you will create a product page upsell offer that can display:
- Related products
- Shopify add-on products
- Frequently Bought Together style offers
- Optional discounts
- Button, checkbox, or toggle CTAs
- A product carousel when you add more products
Prerequisites
Before creating your offer, you need to do two things.
1. Install AS Discounts & Upsells App {#1-install-as-upsells–bundles}
Install the app from the Shopify App Store:
Install AS Discounts & Upsells App
Once installed, you can create upsells, cross-sells, add-ons, quantity breaks, volume discounts, BOGO offers, and BXGY deals from one app.
For this guide, we’ll focus on product page upsells.
2. Add the app block to your product page
After installing the app, open your Shopify theme editor and add the app block to your product page template.
This tells Shopify where the upsell offer should appear on the product page.
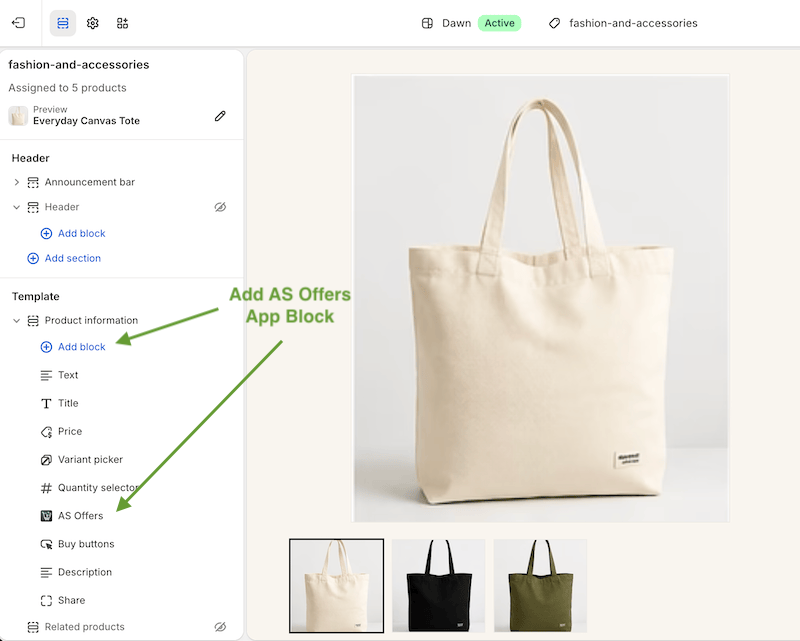
Once the app block is added, you can create and publish offers from the app dashboard.
Step 1: Create a new offer
Open the AS Discounts & Upsells App app dashboard and click Create Offer.
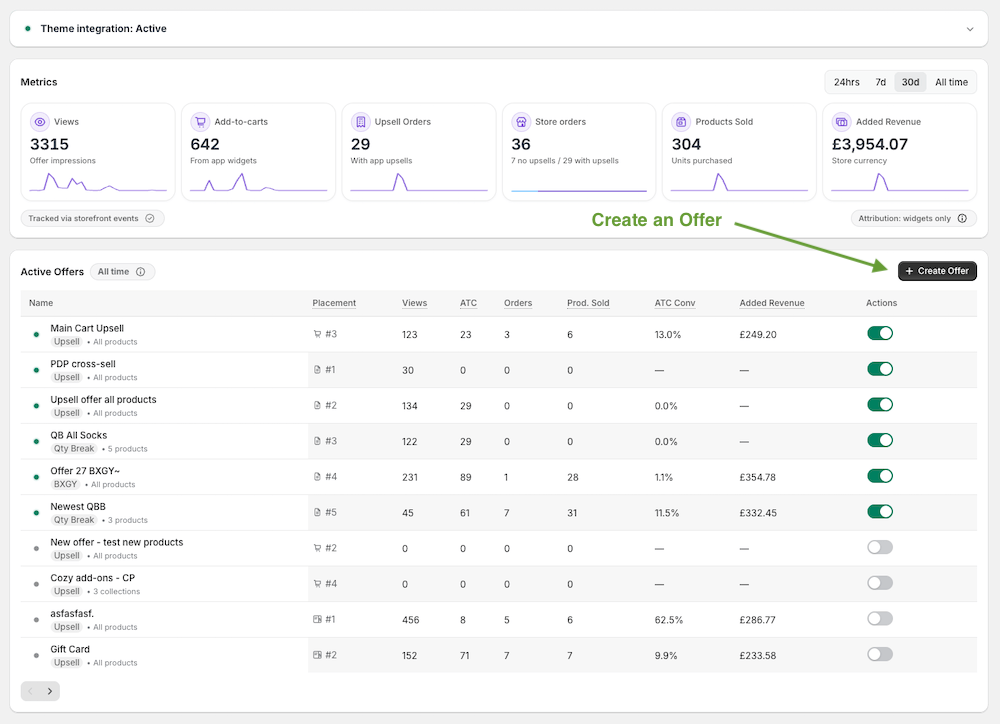
This starts the setup flow for your new Shopify upsell offer.
Step 2: Choose the Upsell & Cross-sell offer type
Next, choose Upsell & Cross-sell as your offer type.
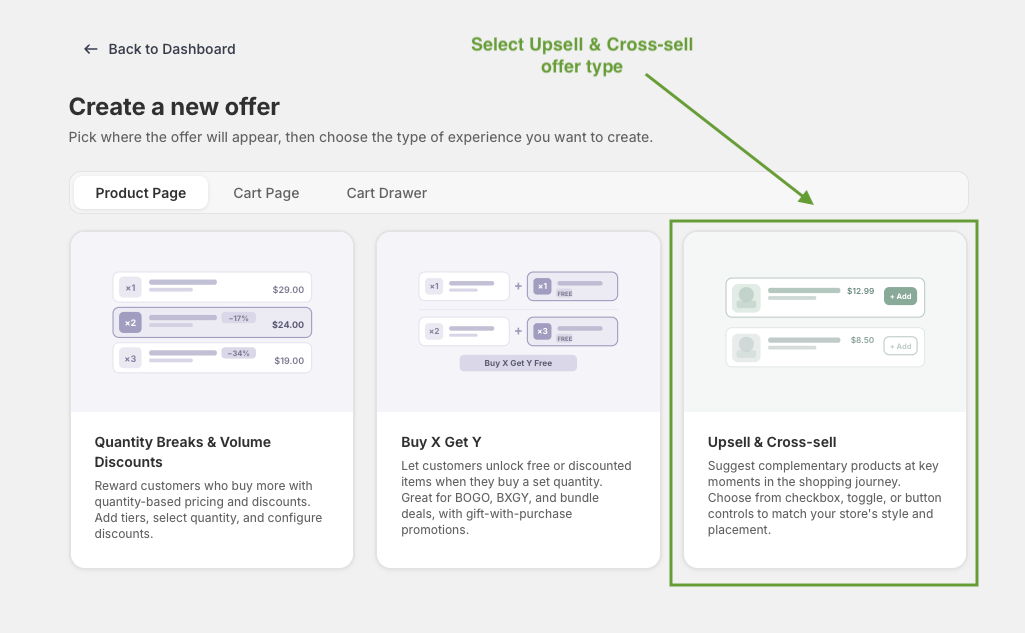
This offer type is best for showing add-on products, related products, accessories, or Frequently Bought Together style recommendations.
You can also create Volume Discounts & Quantity Breaks, BOGO, and BXGY offers in the app, but those are separate offer types.
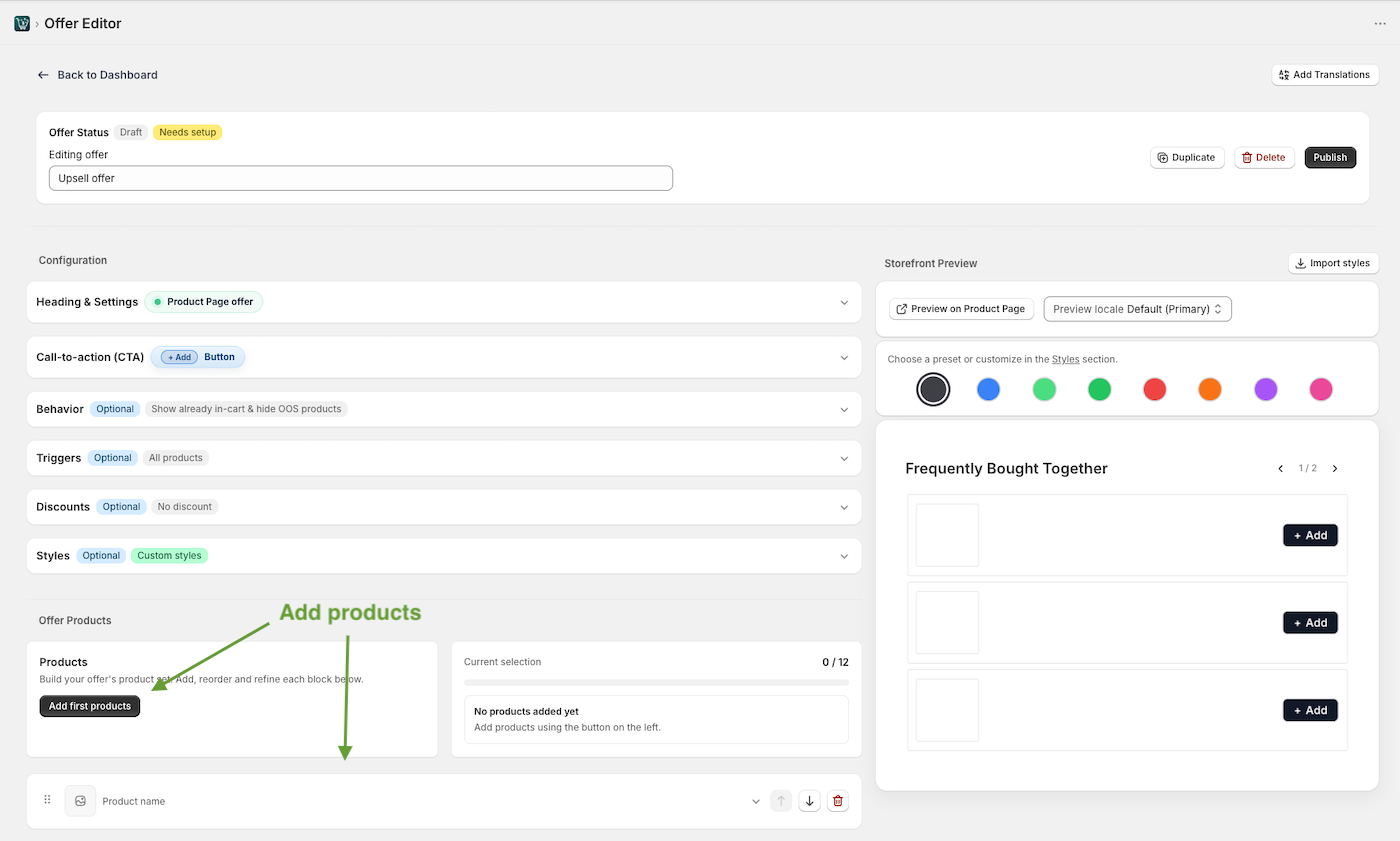
Step 3: Add products to your upsell offer
Click Add products and choose the products you want to show in your offer.
You can add up to 12 products.
This is useful when you want to show:
- Product add-ons
- Accessories
- Related products
- Complementary items
- Shopify Frequently Bought Together style products
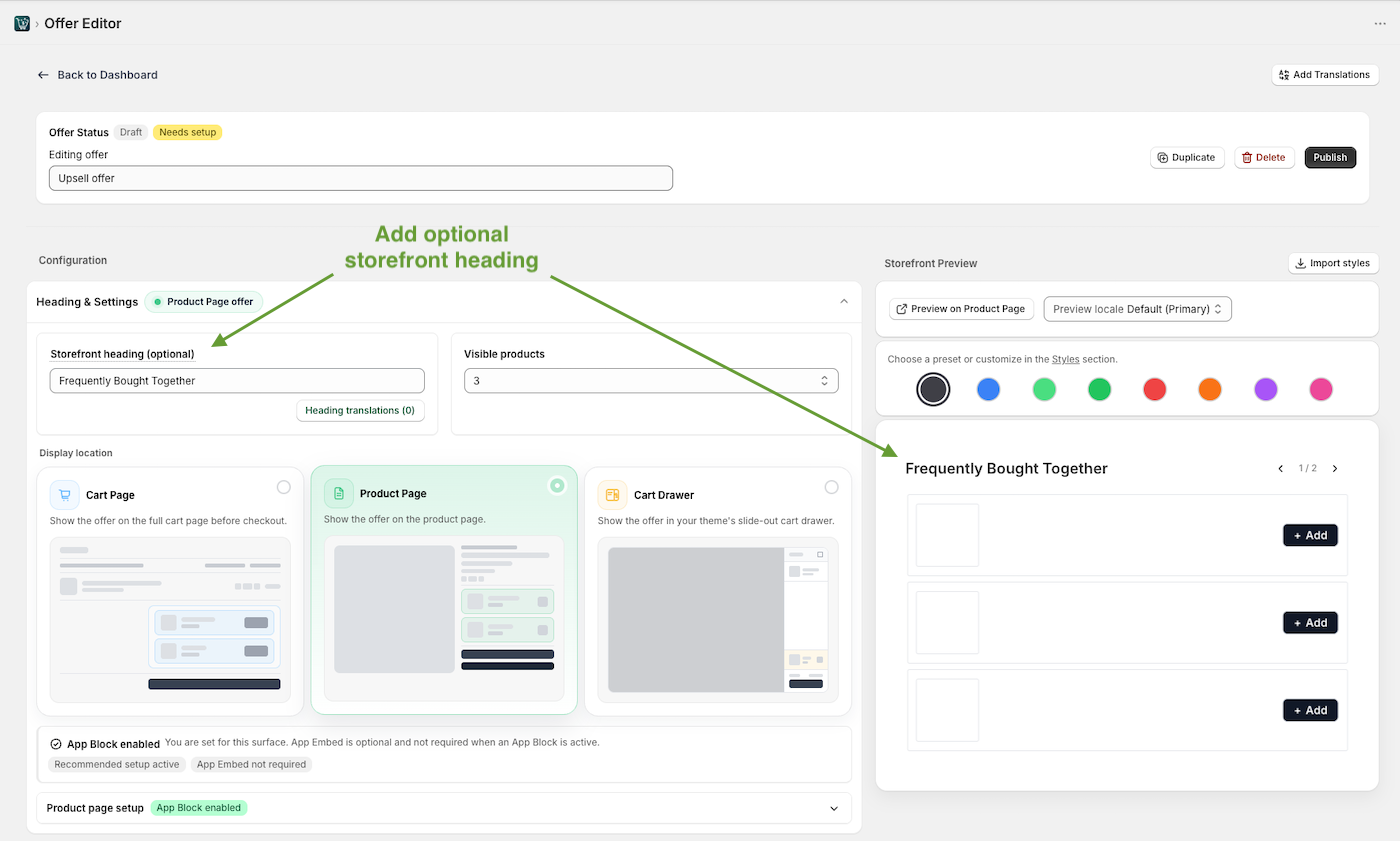
Add storefront heading & create a product carousel
You can add an optional storefront heading, and also control how many products are visible at once.
Change the Visible products setting from 1 to 4.
If you add more products than the visible products setting, the offer becomes a carousel.
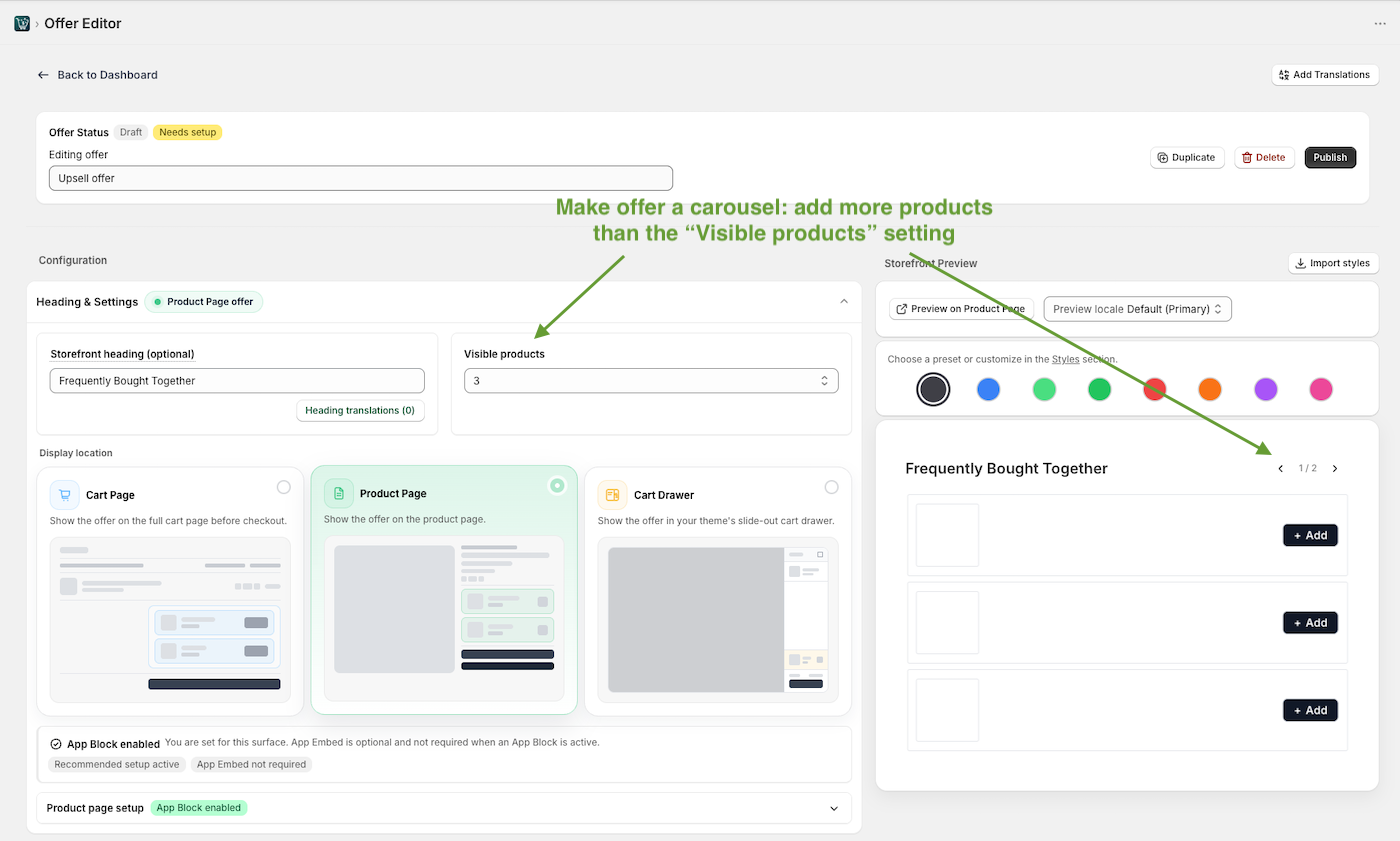
For example, if you add 8 products and set visible products to 3, customers can scroll through the offer as a carousel.
Step 4: Choose your CTA type
Next, choose how customers should add the upsell product.
You can use:
- Button
- Checkbox
- Toggle
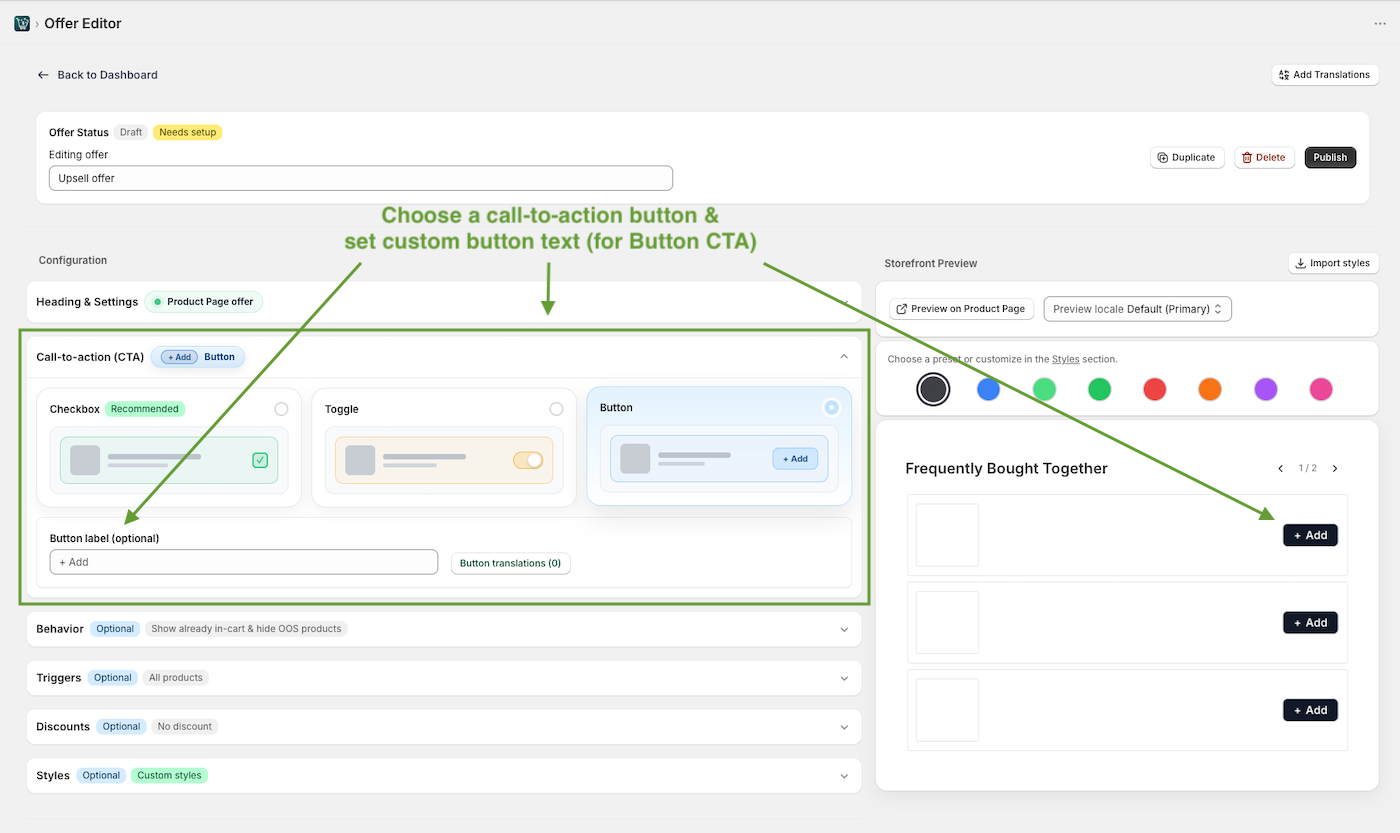
A button works well for standalone upsell products.
A checkbox or toggle works well for useful add-ons, such as gift wrapping, accessories, warranties, care products, or discounted extras.
Add with main product + cart grouping
If you choose a checkbox or toggle, you can enable Add with main.
This means the offer product is added to cart when a customer adds the main product.
If you also enable Add as nested line item, the upsells are added under the main product in cart. If the main product is removed, the add-on is removed too.
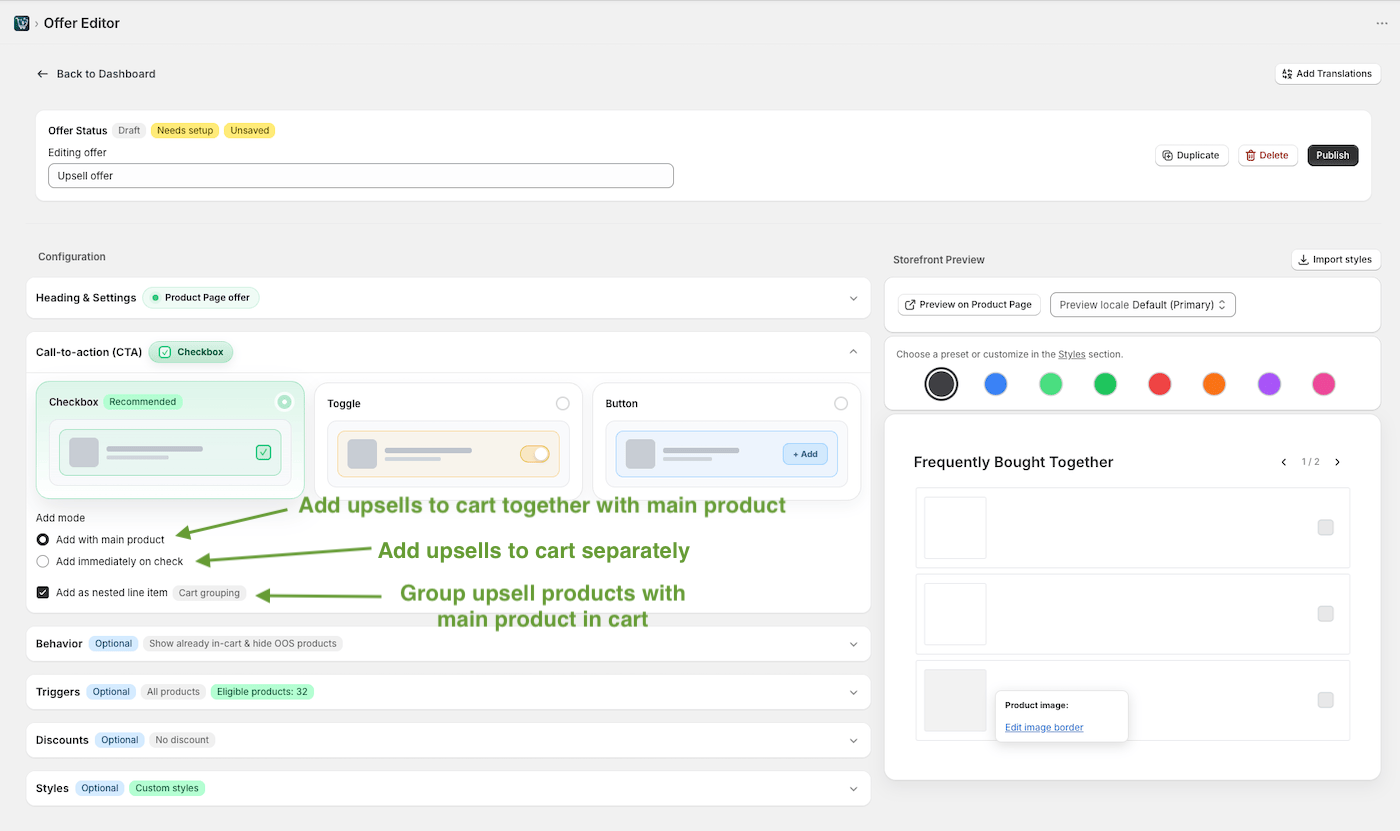
This is useful when the upsell should not be bought on its own.
For example:
- Gift wrapping
- Product protection
- Discounted add-ons
- Bonus items
- Gifts linked to the main product
It helps keep the offer tied to the product that triggered it.
Step 5: Choose your offer triggers
Now choose where the offer should appear.
You can trigger the offer based on:
- Specific products
- Collections
- Product tags
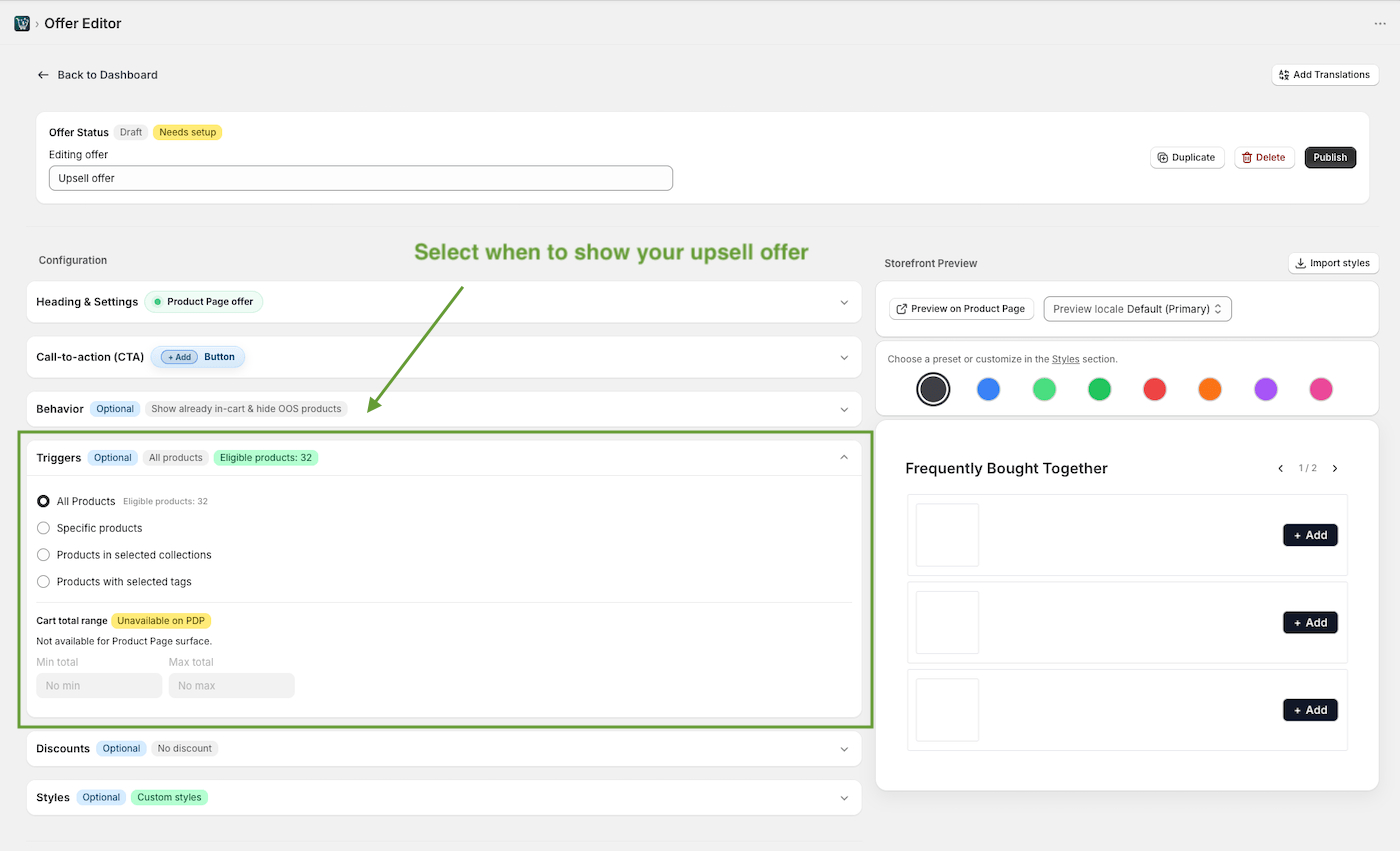
This helps you create more relevant offers.
For example, you could show:
- A leather care kit on leather bags
- Socks on footwear products
- Protein shakers on supplement products
- Gift wrap on gift-friendly items
- Matching accessories on fashion products
The more relevant the offer, the more likely customers are to add it.
Step 6: Adjust the styling
Next, style your offer so it fits your Shopify theme.
You can adjust text, colors, spacing, buttons, borders, badges, and other visual settings.
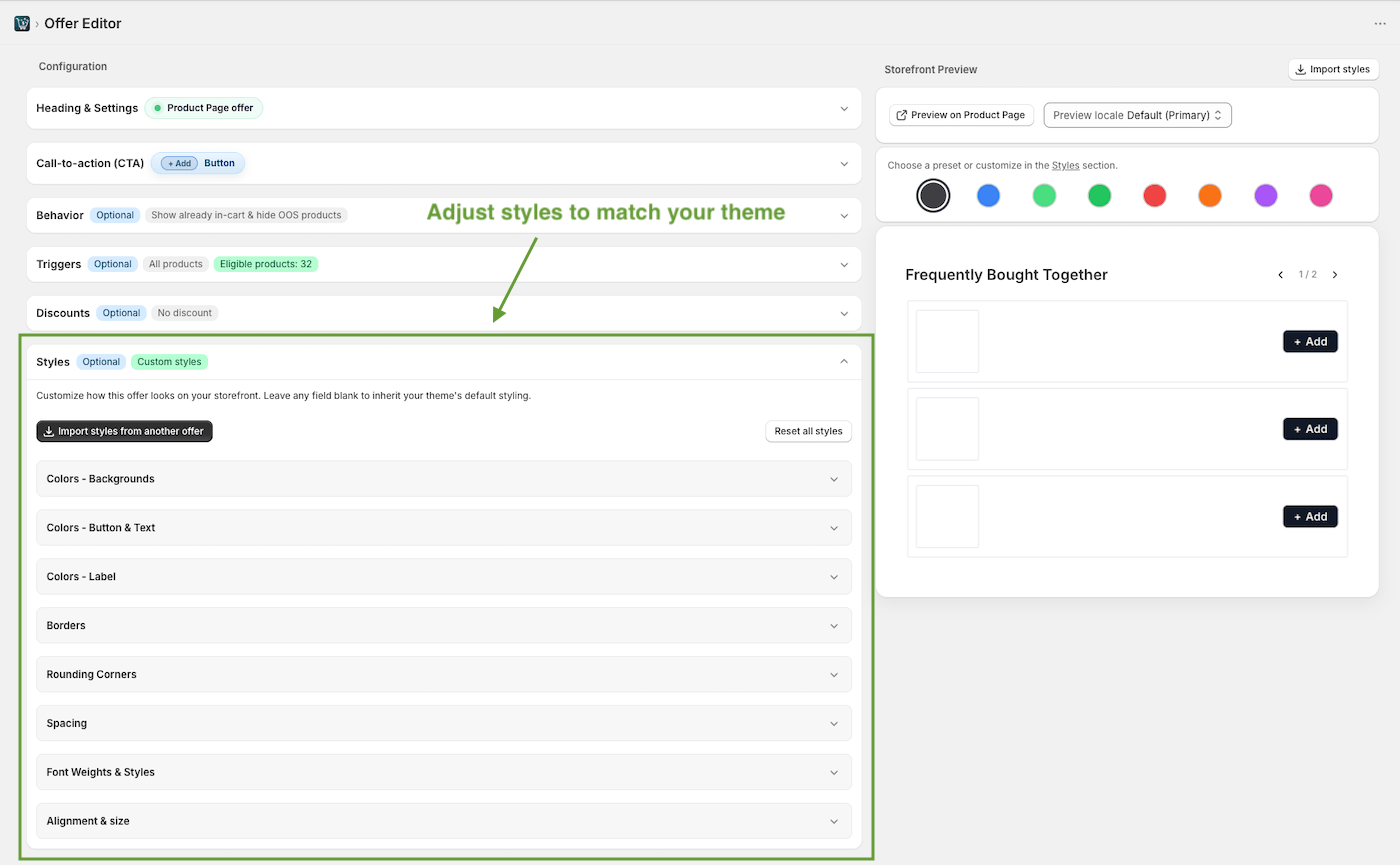
Find style settings faster
In the live preview, hover over any element to quickly see which style setting controls it.
For example, if you hover over the title, you can quickly find the text size, font, or color setting linked to that element.
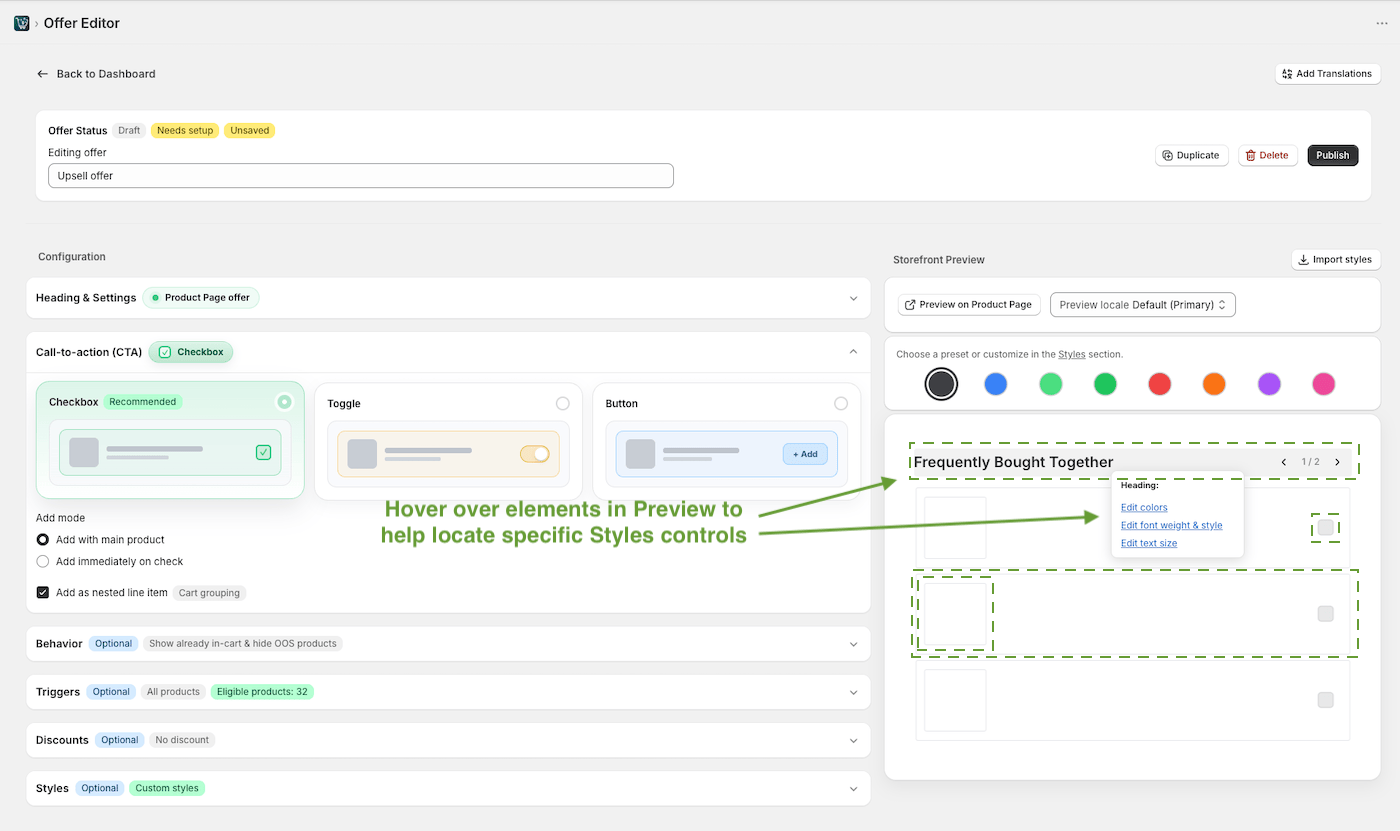
You can come back to this after publishing the offer in Step 8.
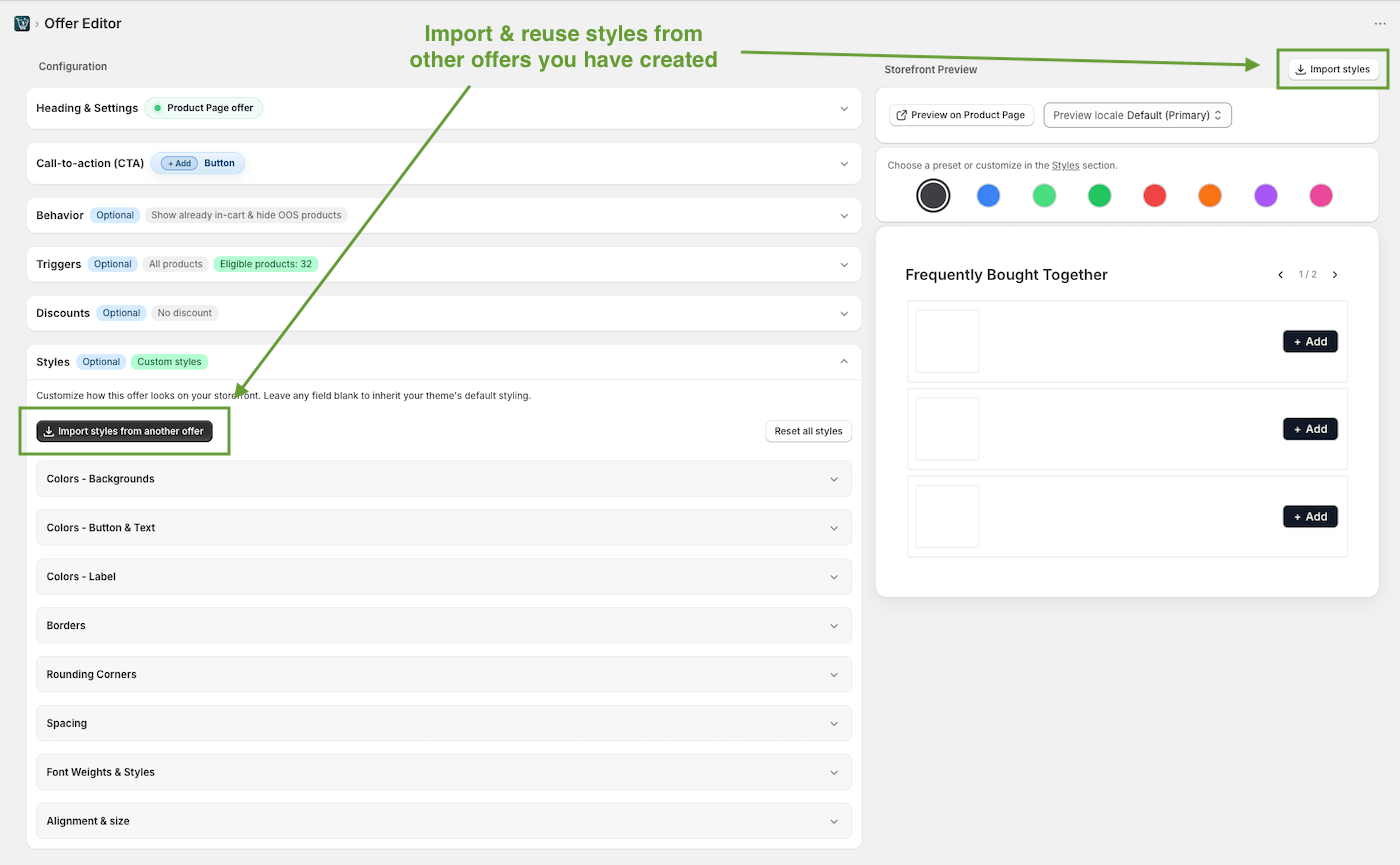
Import styles from another offer
Once you have created at least one offer, you can use Import styles to copy styling from another offer.
This helps keep your product page, cart page, and cart drawer offers visually consistent.
Step 7: Add a discount
You can add a discount if you want to make the upsell more attractive.
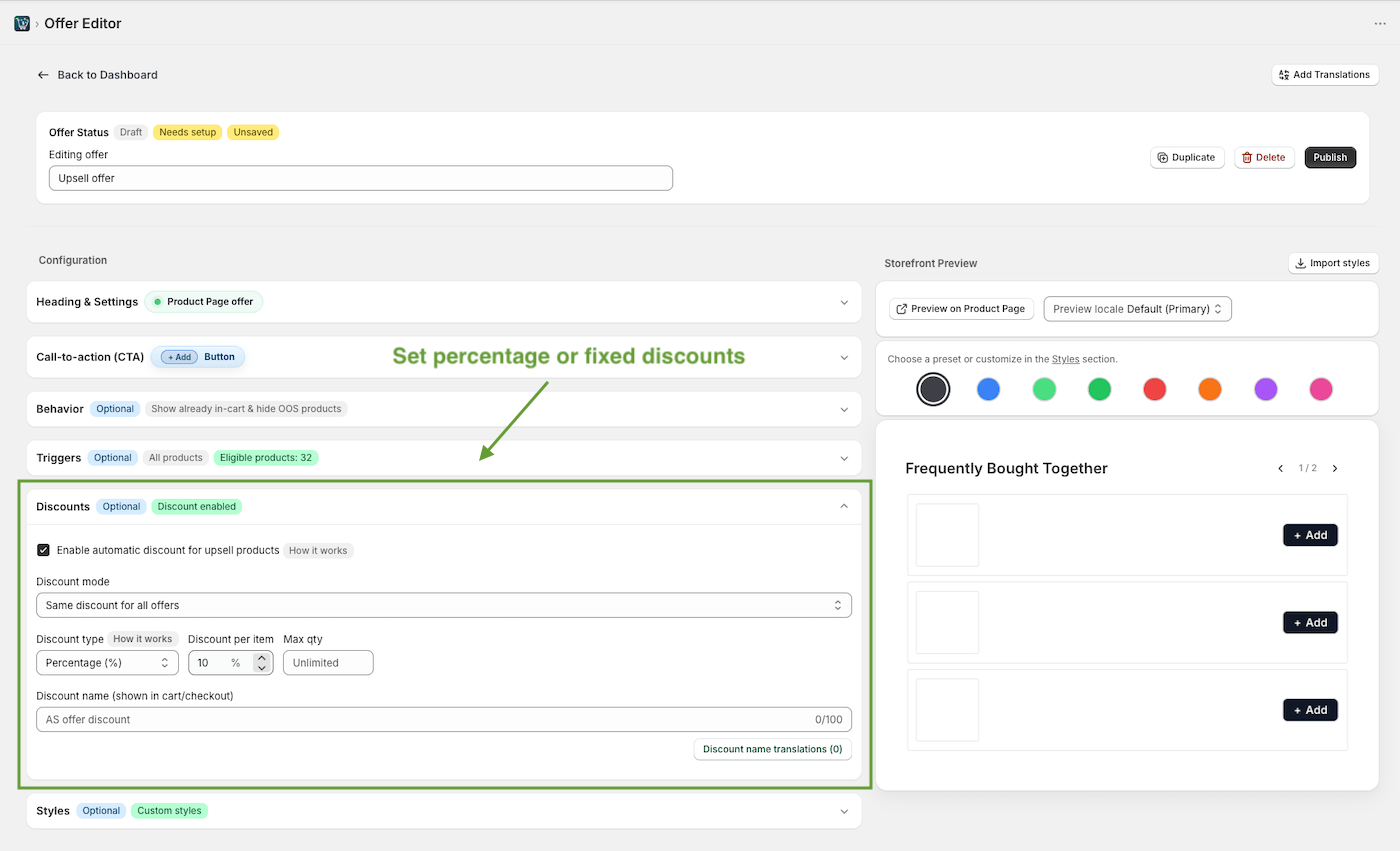
The discount only applies when the product is added through this offer.
It does not change the normal price of the main product.
It also does not permanently change the product price in Shopify.
This is useful when you want to offer something like:
- “Add this for 10% off”
- “Get this add-on for £5 less”
- “Add the matching accessory at a discount”
- “Complete the set and save”
Step 8: Publish & preview the offer on your product page
Once the products, triggers, styles, and discounts are ready, publish the offer, and preview on a live product page.
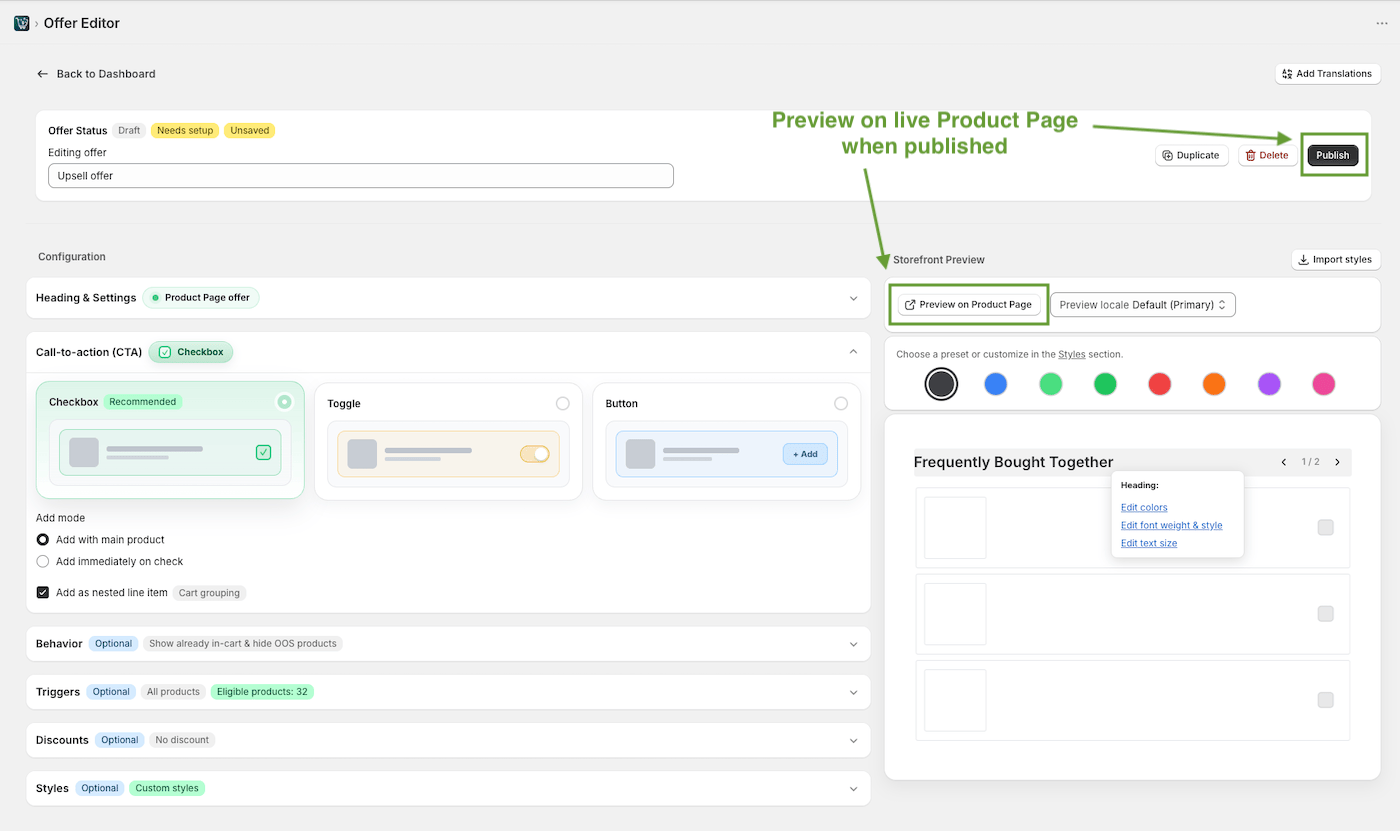
Your offer can now appear on the product pages that match your trigger rules.
Check that:
- The offer appears in the right place
- The products are relevant
- The CTA is clear
- The styling matches your theme
- The discount applies correctly
- The add-on behaves correctly in the cart
Once everything looks good, your product page upsell is live.
Step 9: Translate your offer
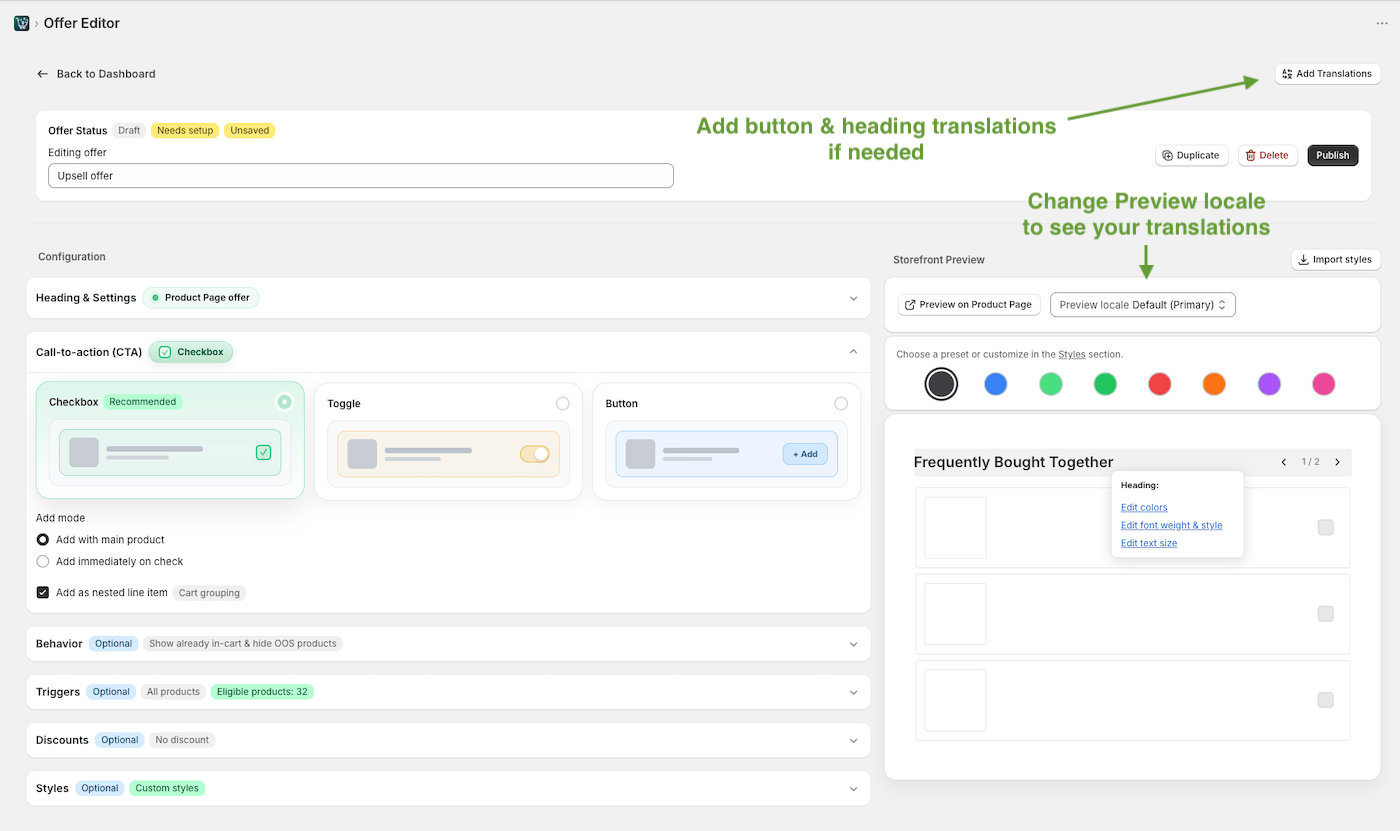
If your store uses multiple languages, you can translate the offer from the Edit Translations page.
You can also select a locale to preview how the offer looks in that language.
What to do next
Creating your first Shopify upsell offer is only the start.
Once it is live, you should track performance and improve it over time.
Track impressions, add-to-carts, revenue, and products sold
In the app, you can track how your offers are performing.
Look at:
- Offer impressions
- Add-to-carts
- Extra revenue generated
- Products sold through the offer
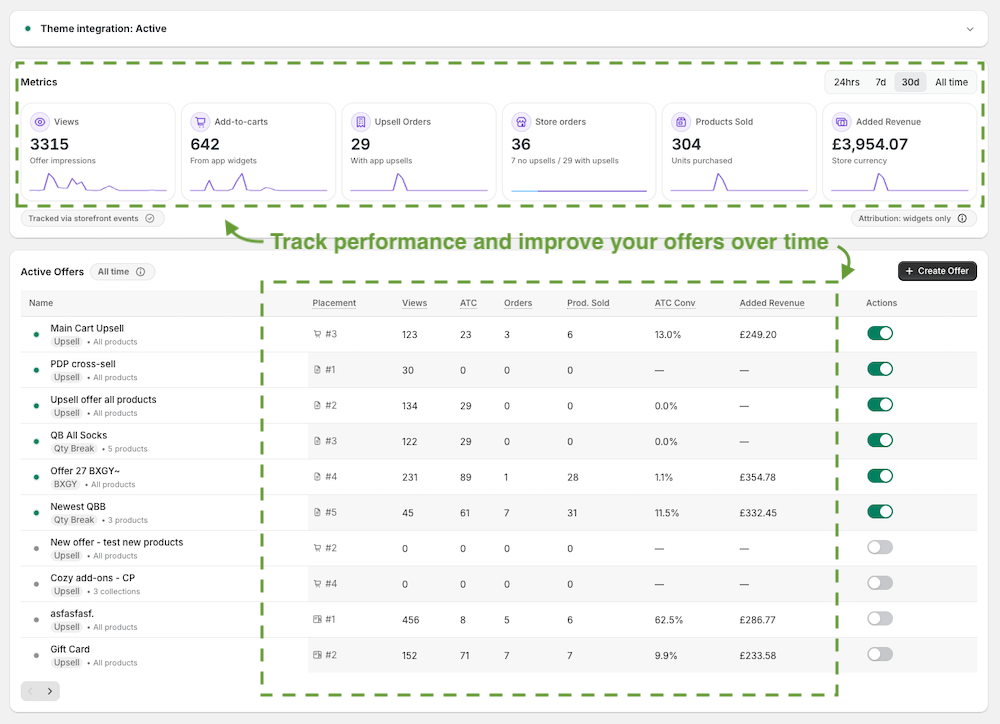
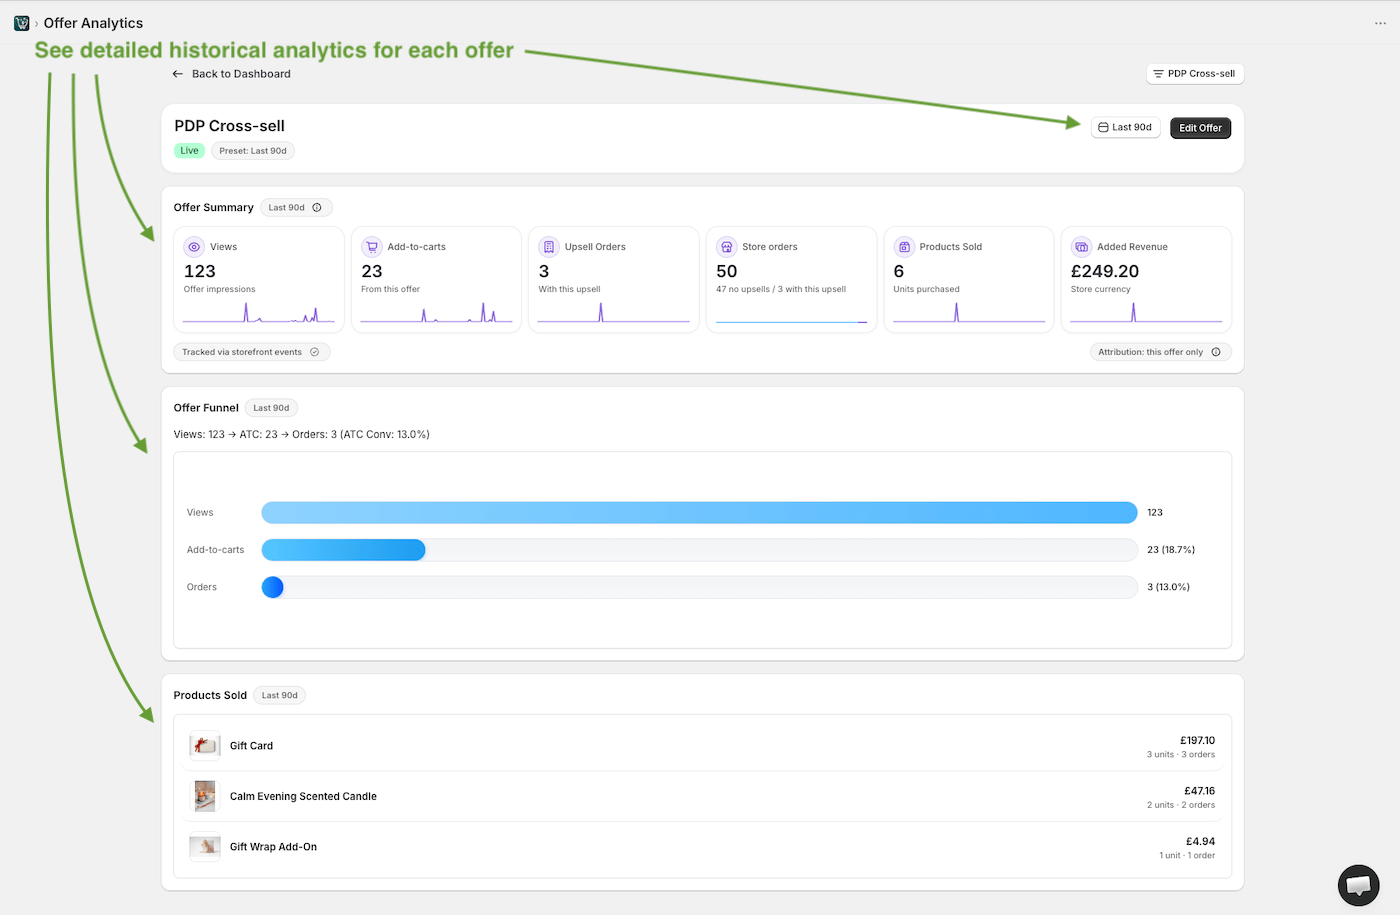
This helps you understand which offers are actually helping your store.
Improve conversions with more relevant add-ons
If an offer gets impressions but few add-to-carts, the product may not be relevant enough.
Try improving it by:
- Using more specific product triggers
- Matching add-ons more closely to the main product
- Testing a clearer offer title
- Adjusting the CTA type
- Adding a discount
- Reducing the number of products shown
Relevant offers usually convert better than broad recommendations.
For example, a care kit shown on a leather product is usually stronger than a generic “You may also like” section.
Try cart page or cart drawer upsells
Product page upsells are great because customers see them before adding the main product to cart, and it’s a perfect place for useful add-ons and related products.
But you can also show offers later in the buying journey, and these often prove to convert well too.
For example, you can create:
- Cart page upsells
- Cart drawer upsells
- Last-minute add-ons
- Free shipping threshold offers
- Related products based on cart contents or cart value
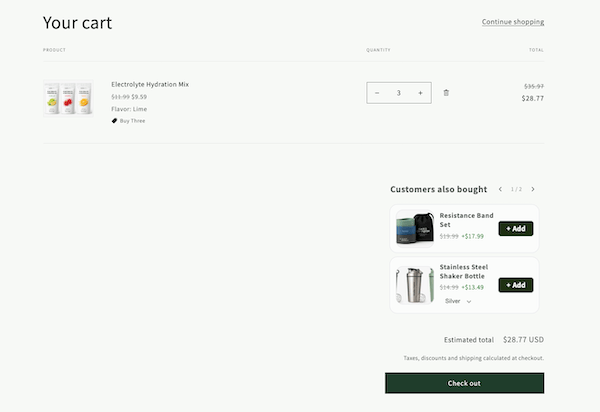
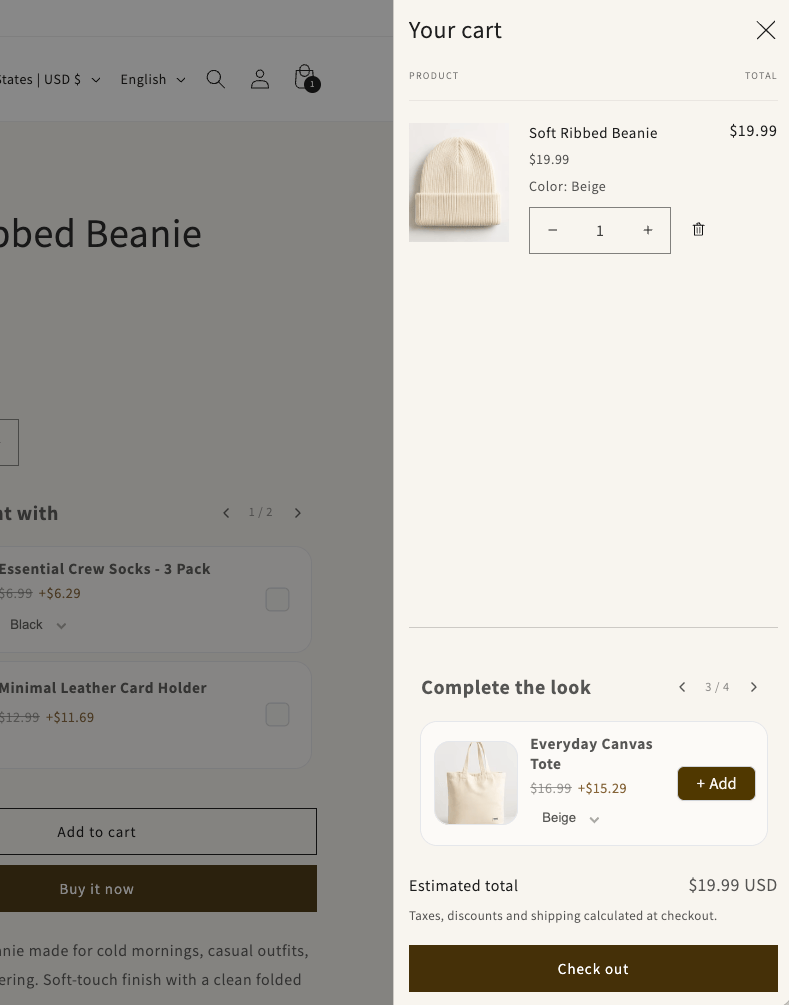
This gives customers another chance to add relevant products before checkout.
Consider quantity breaks, volume discounts, BOGO, or BXGY deals
Some products work better with a different type of offer.
If customers often buy more than one unit, try:
- Quantity breaks
- Volume discounts
- Buy more, save more offers
If you sell products that pair well together, try:
- BOGO deals
- BXGY offers
- Free gift offers
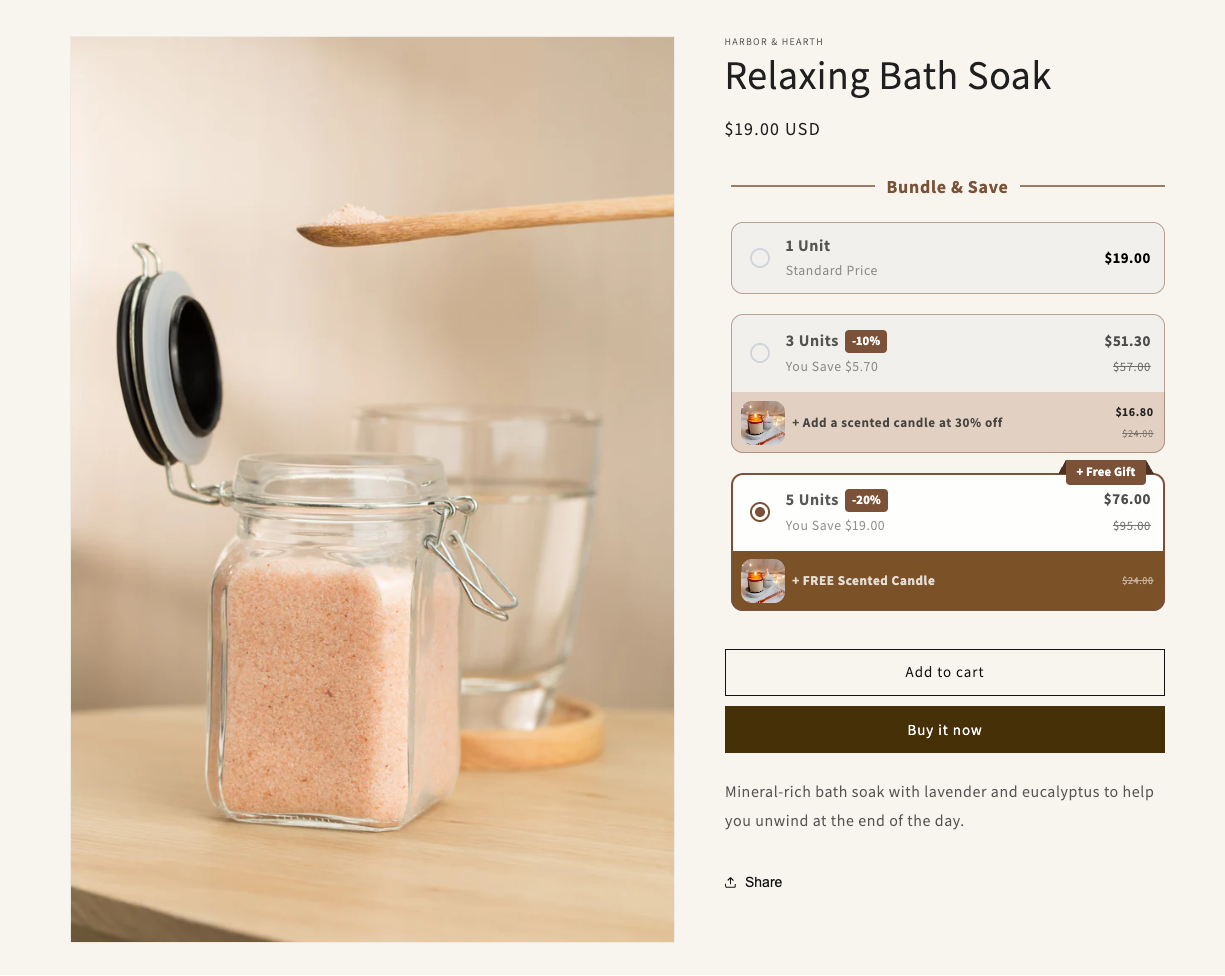
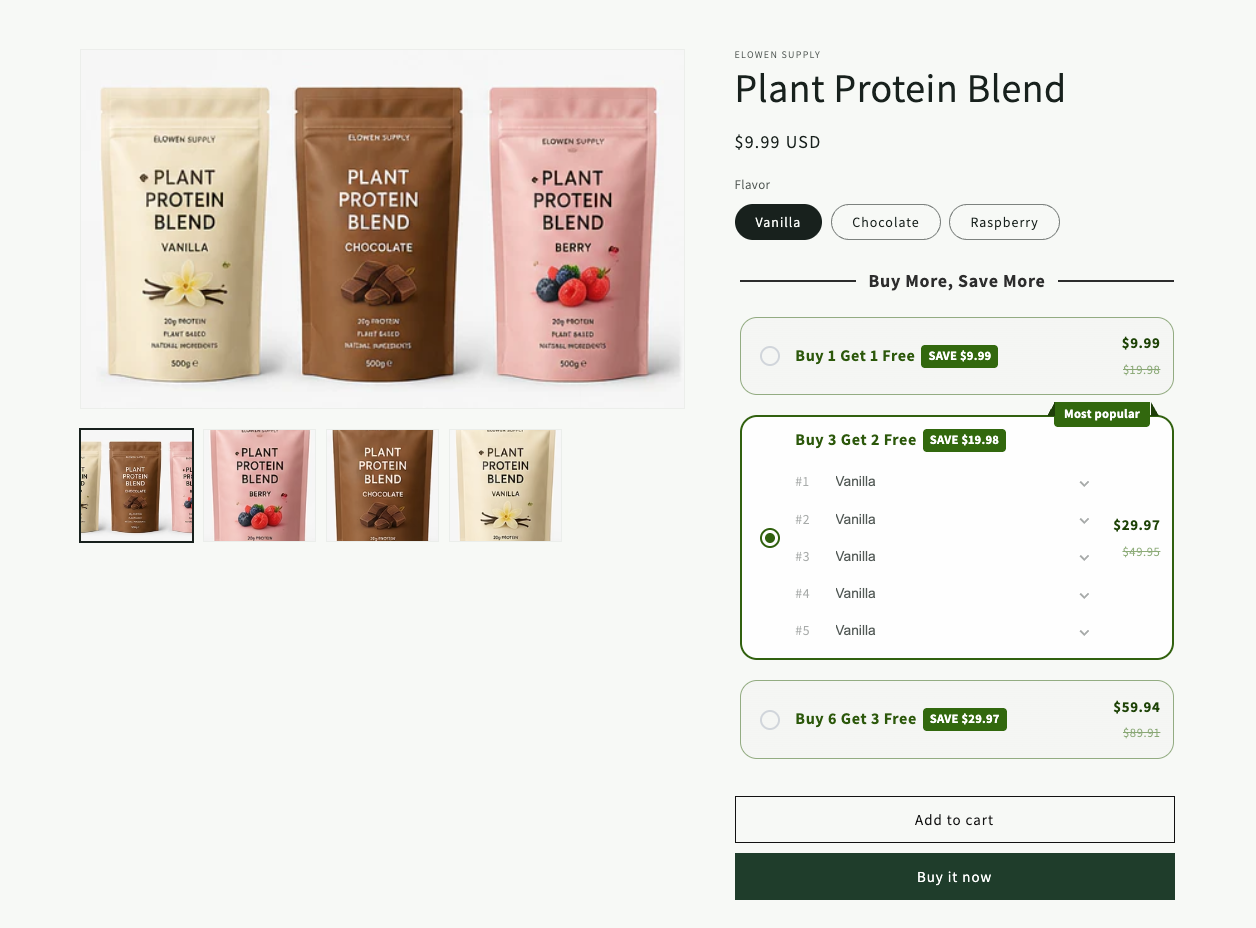
These offers can work well for consumables, accessories, bundles, gifts, and products that customers often buy in multiples.
Final thoughts
Adding upsell products on Shopify does not need to be complicated.
With AS Discounts & Upsells App, you can create product page upsells, cross-sells, add-on products, related product offers, and Frequently Bought Together style sections without custom code.
Start with one focused offer.
Pick a product that already sells well, add a relevant add-on, and track the results.
Once you see what works, you can create more targeted offers across your product pages, cart page, and cart drawer.